Deploy a Drupal Site on Amezmo
- Introduction
- Run the Amezmo Drupal Installer via Composer in our Terminal
- Initialize the Git repository
- Create a new repository on GitHub
- Initial commit and git push
- Create an Amezmo Application and first deployment
- Install Drupal
- Resources
Introduction
In this Drupal deployment guide, we’ll show you how to deploy and host a production-ready Drupal 9 site on the Amezmo PHP platform. At the end of this step-by-step guide, you’ll have a brand new Drupal 9 application with automated deployments directly from GitHub.
In addition to automatic deployments, the PHP hosting environment on Amezmo is automatically optimized for Drupal. Optimizations include Nginx configuration and .env file creation which works out-of-the-box for standard Drupal 9 applications.
Requirements
- GitHub account
- Unix system such as macOS, Ubuntu, or WSL
- Composer installed globally
- Amezmo account
Steps
- Run the Amezmo Drupal Installer via Composer in our Terminal
- Initialize the Git repository.
- Create a new repository on GitHub
- Initial commit and git push
- Create an Amezmo Application and first deployment
- Install Drupal
Run the Amezmo Drupal Installer via Composer in our Terminal
Knowing that we have installed Composer globally, we can use the composer command to install Drupal from a
create-project command. Open up the terminal and execute the following command:
cd $HOME
composer create-project sdubois/amezmo-drupal-recommended
If we run this command, our output should be similar to the screenshot below.

Initialize the Git repository
In the previous step, we used Composer to create a new Drupal application. By default, the composer installer created a new directory called amezmo-drupal-recommended. This will be where our application lives. Feel free to rename this directory to whatever you wish. We're using Git to deploy our application, and to keep track of the changes we make. Let's first initialize our new Drupal app with Git. In the same terminal run the following commands.
cd amezmo-drupal-recommended
git init
git add .
git commit -m 'initial commit'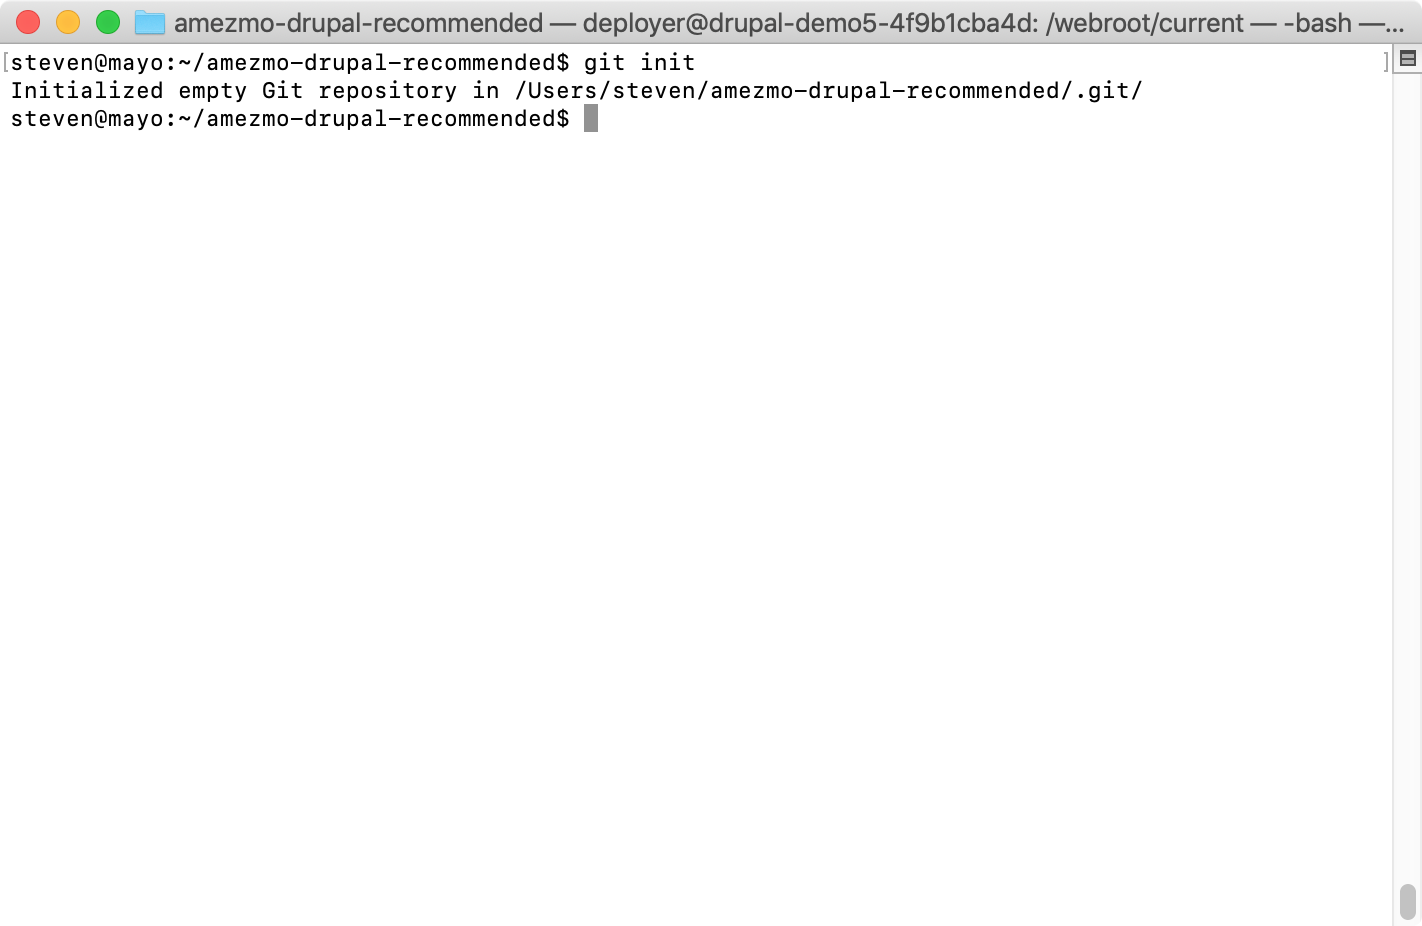
Create a new repository on GitHub
Now that our local git repo is complete, let's create a new repository on GitHub so we can push our code. Create a new GitHub account, or login to your existing account. Create the repository by going to the upper-right hand corner of the GitHub application, and click New Repository.

Fill out the form with the following values. Everything else besides the Repository name field can be left to the default value. Use my-drupal-site for the Repository name. Click the green Create repository button after filling out the form.

Initial commit and git push
We already created a fresh Drupal application, initialized a new git repository both locally and on GitHub, so we're almost done. Next, we'll push our code to GitHub. But first we need to tell our local Git repo that there's now a remote place (GitHub) for the code to be pushed to.
This is easy and only requires a few extra steps. Run the following set of commands in the top-level directory of our application. These commands are the same ones that are presented on GitHub after first creating the repository. Ensure we've replaced $USERNAME with our own GitHub username before running the commands.
USERNAME=<your github username>
git remote add origin git@github.com:$USERNAME/my-drupal-site.git
git branch -M main
git push -u origin main
After running the commands above, we should see something similar to the screenshot below.

Create an Amezmo Application and first deployment
Now that our code is on GitHub, we're ready to launch our Amezmo application instance to deploy our Drupal project. This instance will be where our Drupal project is both hosted on, and deployed to. Login to your Amezmo account and launch a new application from the “Add Application” button on the top.
From the new application form, select PHP as the application type, give your site a name and optionally a domain name (this can always be added later). Next, choose PHP version 7.4, and Composer 2.x. From there, choose your desired Instance type and click “Launch”. Amezmo spins up your application environment for you, which typically takes a few minutes.
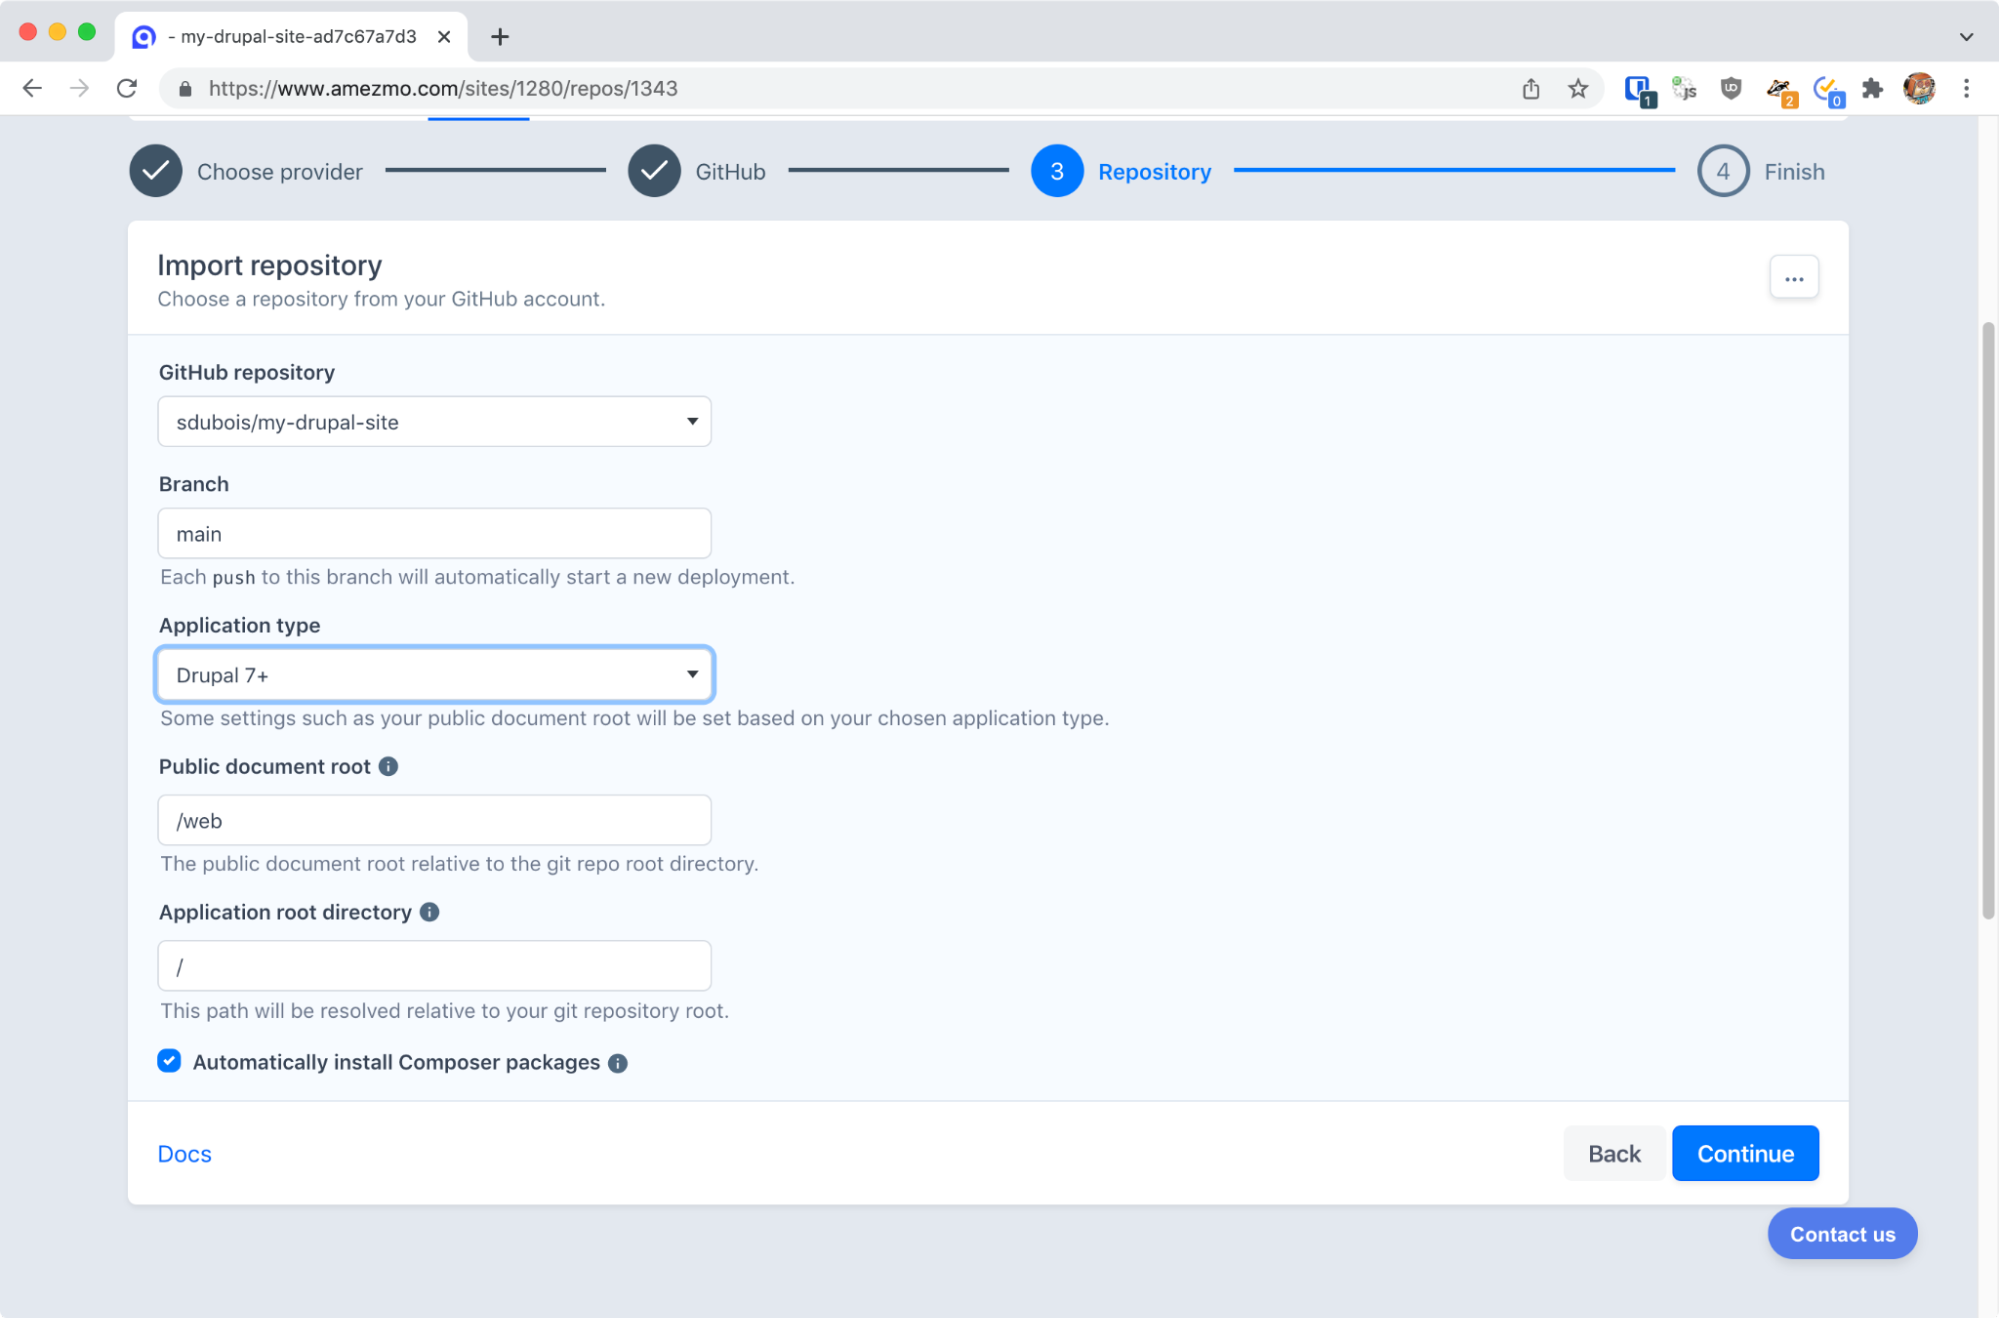
When this process is complete, choose a Git provider. Choose GitHub, or your preferred provider and follow the instructions for authentication. Choose your repository, branch and application type in the form.
After clicking the “continue” button, Amezmo asks you about automatic deployments. Choose “Yes”.
By using automatic deployments, a new deployment starts after commits are created in the main branch.
Typically, this is after running git push, but deployments are also triggered by merging a pull request, for example.
After clicking “Next”, Amezmo pulls your code from GitHub and runs the initial deployment. View the Deployments tab to verify a successful deployment. Click on the deployment to view real-time updates.

Install Drupal
Now that we’ve completed the initial setup and deployment, we can go ahead and install Drupal. To do this, click on the automatically generated URL for your application on the top of the page ending with amezmo.co. This should bring up the Drupal 9 installation screen.

From here you will want to select your language, choose the “Standard” installation profile and then click “Save and continue”. Drupal will automatically detect your Database credentials through the provided environment variables, and begin the installation process. When this is completed you will be asked to configure the site by providing a site name, email address, and admin user credentials.

After filling this form out and clicking “Save and continue” the process will complete and you will be redirected to the Drupal 9 homepage
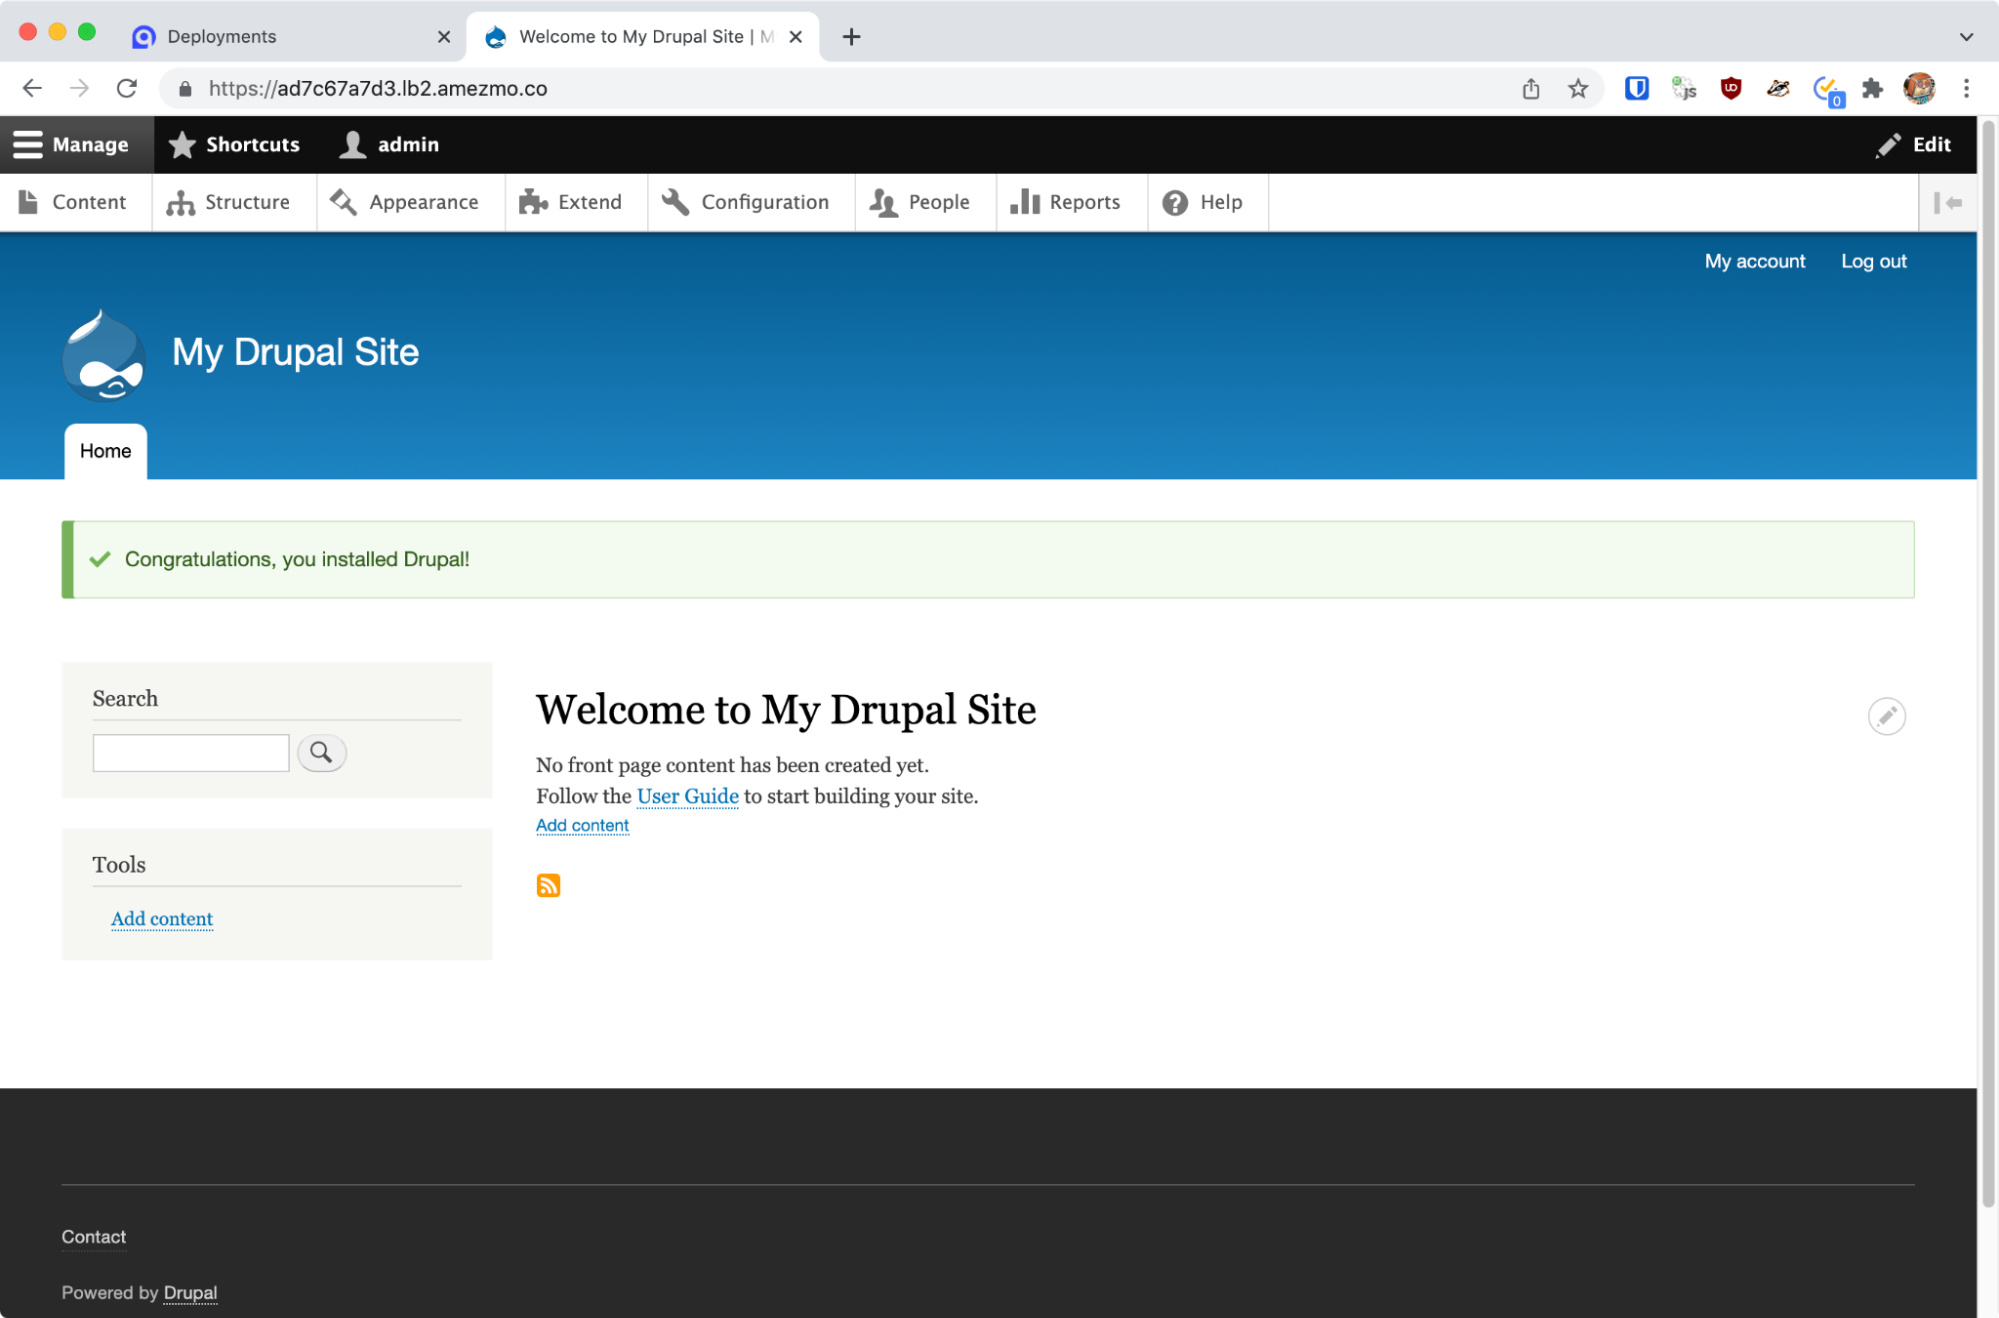
And that’s it! You now have a production-ready Drupal 9 site running on the Amezmo platform.
From here you can proceed to install modules with composer, create a custom theme, and populate your site with content.
Resources
Deploy your Drupal application on Amezmo for FREE.