How to Deploy Your Laravel Application to Production
by Amezmo

As an alternative to hosting Laravel on Heroku and other shared hosting providers, in this step-by-step complete tutorial, we’ll go over how to host a Laravel app with Amezmo. The end result is a complete Laravel application that’s production-ready, database driven, and setup for automatic, zero-downtime deployments with Git.
At the end of this tutorial, we’ll deploy a Laravel application with MySQL, Redis, HTTPS and the follow features:
- Continuous delivery with automated deployments
- Efficient queues powered by Redis
- HTTPs domain with automated certificate renewals
- Laravel task scheduler
- Automated database backups
In this Laravel hosting guide, we’ll show you how to install Laravel locally with Composer and how to host and deploy our Laravel app on Amezmo with git. At the end of our guide, we’ll ultimately be setup for zero-downtime deployments each time we push to our repository on GitHub and we’ll be taking advantage of all the features Laravel has to offer like Queues, and scheduled tasks. We’ve borrowed parts of this guide from the official Laravel Installation docs.
While the official docs explain how to install Laravel locally with Composer, our guide aims at hosting Laravel on a server that other people on the Internet can see and use. The important thing to keep in mind is that we’re setting up a Git-first approach to hosting and deploying Laravel apps to the cloud. That means we will not be using FTP, or any other deployment tool. Our zero-downtime deployments will begin with a simple `git push`.
If you’re used to hosting Laravel apps with shared hosting, or even a VPS, then we should highlight the difference between shared hosting and Laravel cloud hosting. The major disadvantage of shared hosting, especially for Laravel apps, is that we have less control over the actual server and ultimately, we lose the ability to use some of the advanced Laravel features like queues, and task scheduling.
Other issues with deploying laravel apps on shared hosting is that modern development doesn’t use FTP to upload code and many providers don’t offer automated deployments with Git. These days we use Git to deploy our Laravel apps, even if they are just simple apps. Using Git is a best practice in 2020.
With VPS hosting, you get all the power you need, but the tradeoff is the time it takes to configure the VPS for hosting Laravel apps. On Amezmo, we combine the power of a VPS but remove the complexity and time commitment required to maintain the server for hosting our Laravel apps. For zero-downtime PHP deployments, we’ll typically use a tool like Envoyer, but that requires using a VPS provider like Digital Ocean, or AWS. On Amezmo, we also have the zero-downtime PHP deployment aspect and it’s included with the server.
If you haven’t signed up for Amezmo yet, you can host this Laravel app for free with Amezmo.
Requirements
- GitHub account
- Unix system such as macOS, Ubuntu, or WSL
- Composer installed globally
- Run the Laravel Installer via Composer in our Terminal
- Initialize the Git repository.
- Configure our queue to use Redis
- Create a new repository on GitHub
- Initial commit and git push
- Create Linux server and first deployment
- Add a Cron job for the Laravel Task Scheduler
- Add a worker for the Laravel queue
- Setup automated database backups
Run the Laravel Installer with Composer in our Terminal
Knowing that we have installed Composer globally, we can use the composer command to
install
Laravel from a create-project command. Open up the terminal and execute the following
command:
cd $HOME
composer create-project laravel/laravel
If we run this command, our output should be similar to the screenshot below.

Initialize our Git repository
In the previous step, we used Composer to create a new Laravel application. By default, the Laravel
installer, created a new directory called laravel.
This will be where our application lives.
We're using Git to deploy our application, and to keep track of the changes we make. Let's first
initialize our new Laravel app with Git. In the same terminal run the following commands.
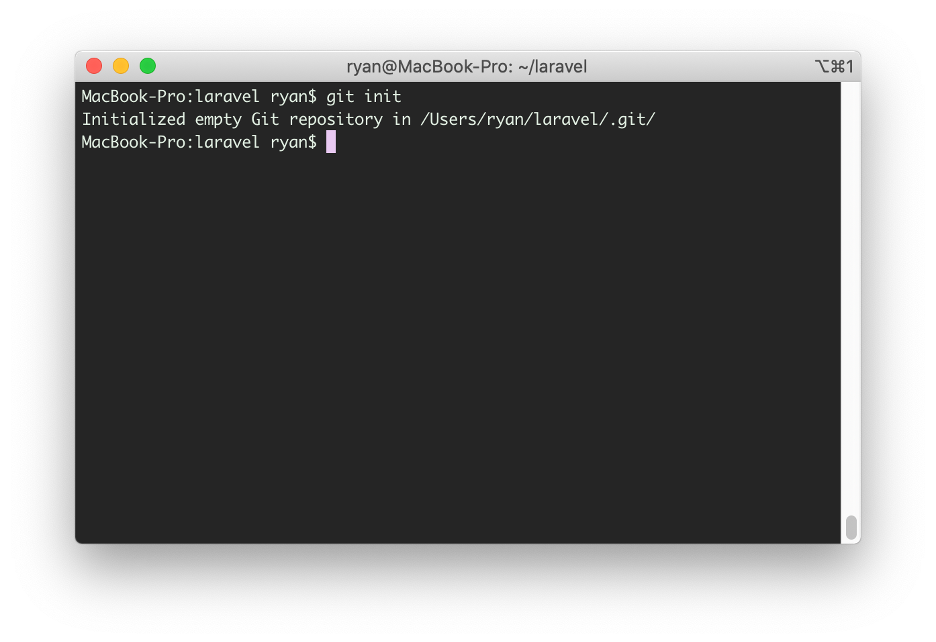
cd laravel
git init
git add .
git commit -m 'initial commit'
We should see a message from Git like the one in the image below.
Configure our queue to use Redis
Since we're using Redis queues, we'll need to update our Laravel app configuration to use the
redis
driver for as our default queue driver. Open up the file config/queue.php and change
the default to redis.

As seen in the screenshot, Laravel will first look for a variable named QUEUE_CONNECTION
in the top-level .env file.
If a value is found, then it would be used rather than the value from the second argument to the
env function.
Today we're not going to define an environment variable because we know we want to use Redis as our
queue locally, and on the server.
Let's ensure we've modified our queue configuration to match what's in the screenshot above.
After we change our queue driver, let's commit these changes. Run the following commands from the top-level directory for our new application.
git add app/queue.php
git commit -m 'Use Redis as the default queue driver'
Create a new repository at GitHub
Now that our local git repo is complete, let's create a new repository on GitHub so we can push our code. Create a new GitHub account, or Login to your existing account. Create the repository by going to the upper-right hand corner of the GitHub application, and click New Repository.

Fill out the form with the following values. Everything else besides the Repository name field can be left to the default value. Click the green Create repository button after filling out the form.
| Repository name | laravel-app |

Initial commit and git push
We already created a fresh Laravel application, initialized a new git repository both locally and on GitHub, so we're almost done. The next we'll do is push our code to GitHub. But first we need to tell our local Git repo that there's now a remote place (GitHub) for the code to be pushed to.
This is easy and only requires a few extra steps. Run the following set of commands in the top-level directory of our application. These commands are the same ones that are presented on GitHub after first creating the repository. Ensure we've replaced <USERNAME> with our own GitHub username before running the commands.
git remote add https://github.com/<USERNAME>/laravel-app.git
git push -u origin master
After running the commands above, we should see something similar to the screenshot below.

Create Linux container on Amezmo
Now that our code is on GitHub, we're ready to launch our Linux container instance to deploy our Laravel project. This instance will be where our Laravel project is both hosted on, and deployed to. Login to your Amezmo account and launch a new application server from Instances > New.
From the new application form, use "laravel-app" for the Name, and use any top-level domain that'd you'd like. Amezmo will generate a private domain name for us by default when we create a new application. After filling out the form, press Next.

Configure instance settings
Our app uses MySQL and Redis, so the Amezmo defaults will suit us. The only thing we'll change is the PHP version. Select PHP 7.4 and click the blue Launch button to finish setting up our application server.

Git Wizard
After our instance launches, navigate to the Git tab and choose GitHub. From here we'll authorize Amezmo read-only access to our repository. Amezmo will create a unique deploy key and setup a webhook for automated deployments.
In the repository selection form, let's choose our repository, laravel-app from the Git repository dropdown.
Type master for our Branch, and
ensure sure we've chosen "Laravel" as the application type.
Upon changing the application type, Amezmo will fill out the public document root field for us.
Leave Automatically install Composer packages checked, and click the Continue button. In the next step, we'll choose our domain name.

Add a custom domain
When we first launched our instance, we provided a custom fully qualified domain name to use for our app. In the Domain Name step of the wizard, we'll set this domain to map to our git repository. Choose your domain from the dropdown menu as seen in the screenshot below.
If we haven't validated our custom domain yet, we can always use the private domain provided by Amezmo, which is setup automatically.

Automated deployments
As mentioned earlier, our development workflow is Git-first, meaning that we won't edit files
directly on the server. All updates to our application will happen through Git. When we
push our code to GitHub, Amezmo will automatically start a new zero-downtime deployment.
for us.
In the wizard, choose the first option, "Yes", and click the Finish button. After this step, we're done with the Git wizard, and we'll add a Cron job and a Worker process.

Setting up the Laravel task scheduler
Since the Laravel task scheduler is invoked by a Cron job, let's go the Cron tab and add a new entry. Choose a name similar to the one in the screenshot below.
By default, Amezmo will pre-fill the Command field since it knows that our app is a Laravel app. Choose @Minutely for the schedule, and click the "Add Cron Entry" button.

Setup the Laravel Queue worker
Finally, let's add a new worker process that will run in the background on our server. Our process will run the Redis-powered Laravel queue in the background.
Similar to the previous step, Amezmo will also pre-fill the Command field based on the fact that we're imported a Laravel app. The full command, as can be seen in the screenshot below, is as follows:
php artisan queue:work --sleep=3 --tries=3 -vvv
Based on the arguments in our command, our queue will sleep for 3 seconds if there are no jobs to process,
and we'll attempt to complete a job 3 times it is considered permanently failed.
By passing the -vvv argument, we're telling
Laravel to log to show extra information to standard output, so we know that our background queue worker is running.

Our Laravel deployment recap
We're using Amezmo to host and deploy our application.
We've imported a Laravel application to our Amezmo server instance, and we're all setup
for automated, zero-downtime deployments. Each time we run git push on the command line,
Amezmo will
begin the deployment process.
As an advanced option, we can run scripts between each step of our deployment process and install NPM packages, and Composer packages instead of having
Amezmo manage package installation.
For an example, of the available deployment hooks, see the
.amezmo directory
in the
Demo Laravel Application on GitHub.